If you’re already using Zoom for training webinars and managing courses through a Learning Management System (LMS), you’ve probably noticed the amount of back-and-forth it can involve. Switching between platforms, double-checking details, and keeping everything in sync can take up more time than you’d like. How about doing it the smart way – by integrating Zoom with your LMS!
In this article, we’ll discuss how you can integrate Zoom with Klasio and conduct live classes.
Let’s begin.
Why You Should Integrate Zoom with Your LMS
If you’ve ever run training sessions or webinars without integrating Zoom and your LMS, you know the manual effort it involves.
When you connect the two platforms, you save time, reduce errors, and create a smoother experience for both instructors and learners.
You’ll spend less time managing logistics and more time focusing on delivering high-quality content. Plus, learners benefit from clearer communication, better organization, and a more integrated experience.
Let’s look at some of the benefits of integrating Zoom with your LMS platform:
1. Simpler Setup – Less Time Spent Managing Meetings
If Zoom is integrated into your LMS, you can handle everything from one place. You don’t need to jump between systems to schedule or start a meeting. Set it up directly in your LMS. From there, you can access features like recording sessions, chatting with participants, and sharing files without leaving the platform.
2. Easier Scheduling – Keep Everything in One Place
When you’re managing multiple classes or training sessions, keeping track of schedules can get overwhelming. Without integration, you might find yourself entering the same information twice; once in your LMS and again in Zoom. This not only takes extra time but also increases the chance of mistakes.
With Zoom integrated into your LMS, you can schedule sessions directly in your LMS, and all the details are automatically synced with Zoom. This saves you from duplicating work and helps you stay organized.
3. Automatic Notifications – Keep Learners in the Loop
Learners are automatically notified about upcoming Zoom events, so you don’t have to worry about sending reminders manually. The session shows up on their dashboard, and they receive email notifications with all the details they need to join.
These emails also give learners the option to add the event to their personal calendars, which serves as an extra reminder. This reduces confusion about when and where meetings are happening and ensures that learners don’t miss important sessions.
4. Unified Data Tracking – No More Manual Cross-Checking
One of the biggest challenges of running Zoom sessions without integration is tracking attendance. If your learners are enrolled in the session through your LMS but attendance is recorded in Zoom, you’re stuck manually matching the two sets of data.
With Zoom integrated, there’s no need to cross-reference spreadsheets or manually update records. Just log in to your LMS, and you’ll have access to each learner’s progress, attendance, and other training details.
5. Better Insights – Make Data-Driven Decisions
Zoom provides detailed analytics about meeting quality, including things like attendee engagement and audio/video performance. When Zoom is integrated with your LMS, you can use these insights to improve your teaching strategies and make more informed decisions.
For example, you can track how well learners are engaging with specific content or assignments over time. This helps you spot patterns, address challenges early, and adjust your approach to better meet their needs.
6. Live Testing
If your course requires assessments, integrating Zoom with your LMS makes it easier to conduct live, proctored exams. You can host closed-book, timed tests during a Zoom session, where students use their webcams (on computers or phones) to participate. This setup mimics the traditional exam environment, even in a remote setting.
This approach works especially well for distance learning, where maintaining academic integrity and providing a structured testing environment can be challenging.
Integrate Zoom with Klasio as an Admin
You need to be an administrator of the Klasio account to be able to integrate Zoom for live classes. Here are the exact same steps to integrate Zoom with Klasio:
- From your admin dashboard, go to Settings.(It’s located under Management)

2. Locate the Zoom widget and click on Settings.
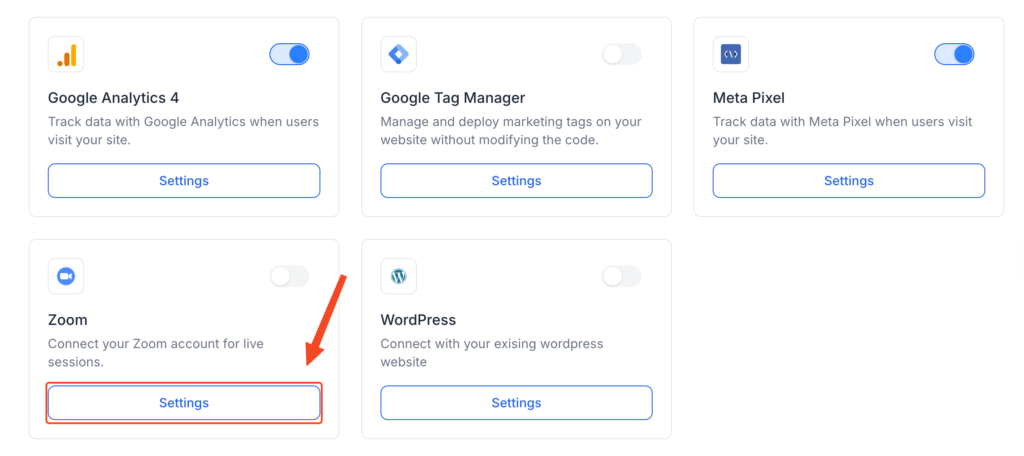
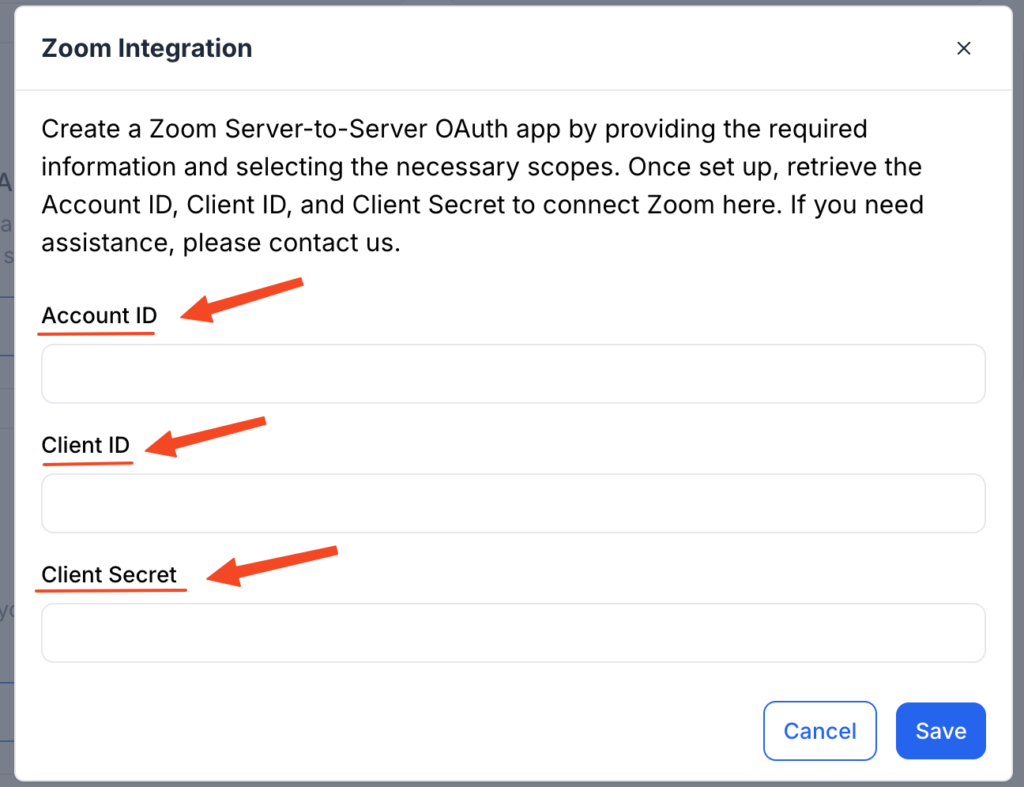
3. On the pop up you’ll asked to enter your Zoom Account ID, Client ID and Client Secret
How to Generate Zoom Account ID, Client ID and Client Secret
1. Sign in or sign up to your Zoom account.

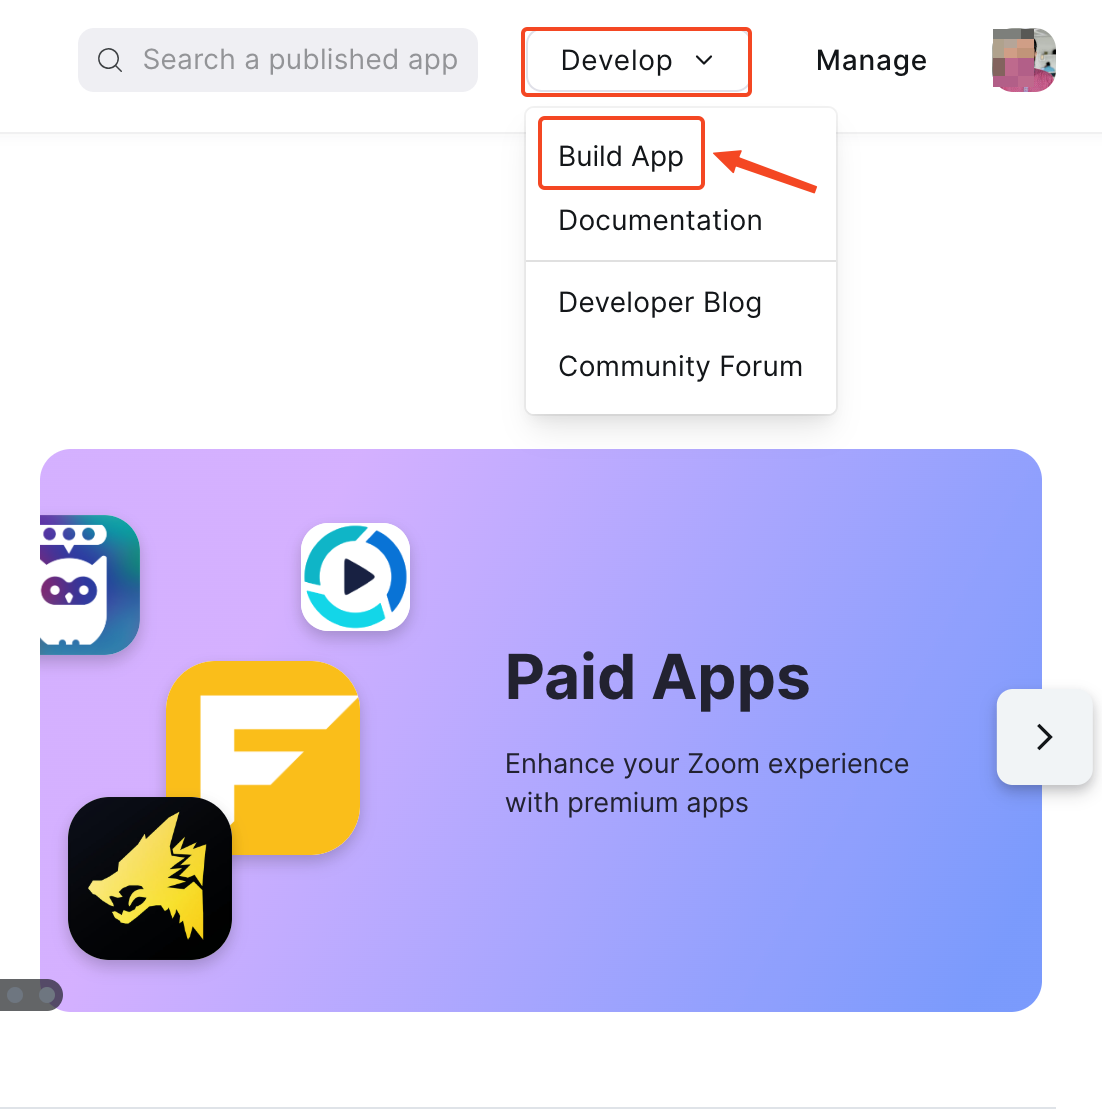
2. Then visit marketplace.zoom.com
3. Click Develop and then select
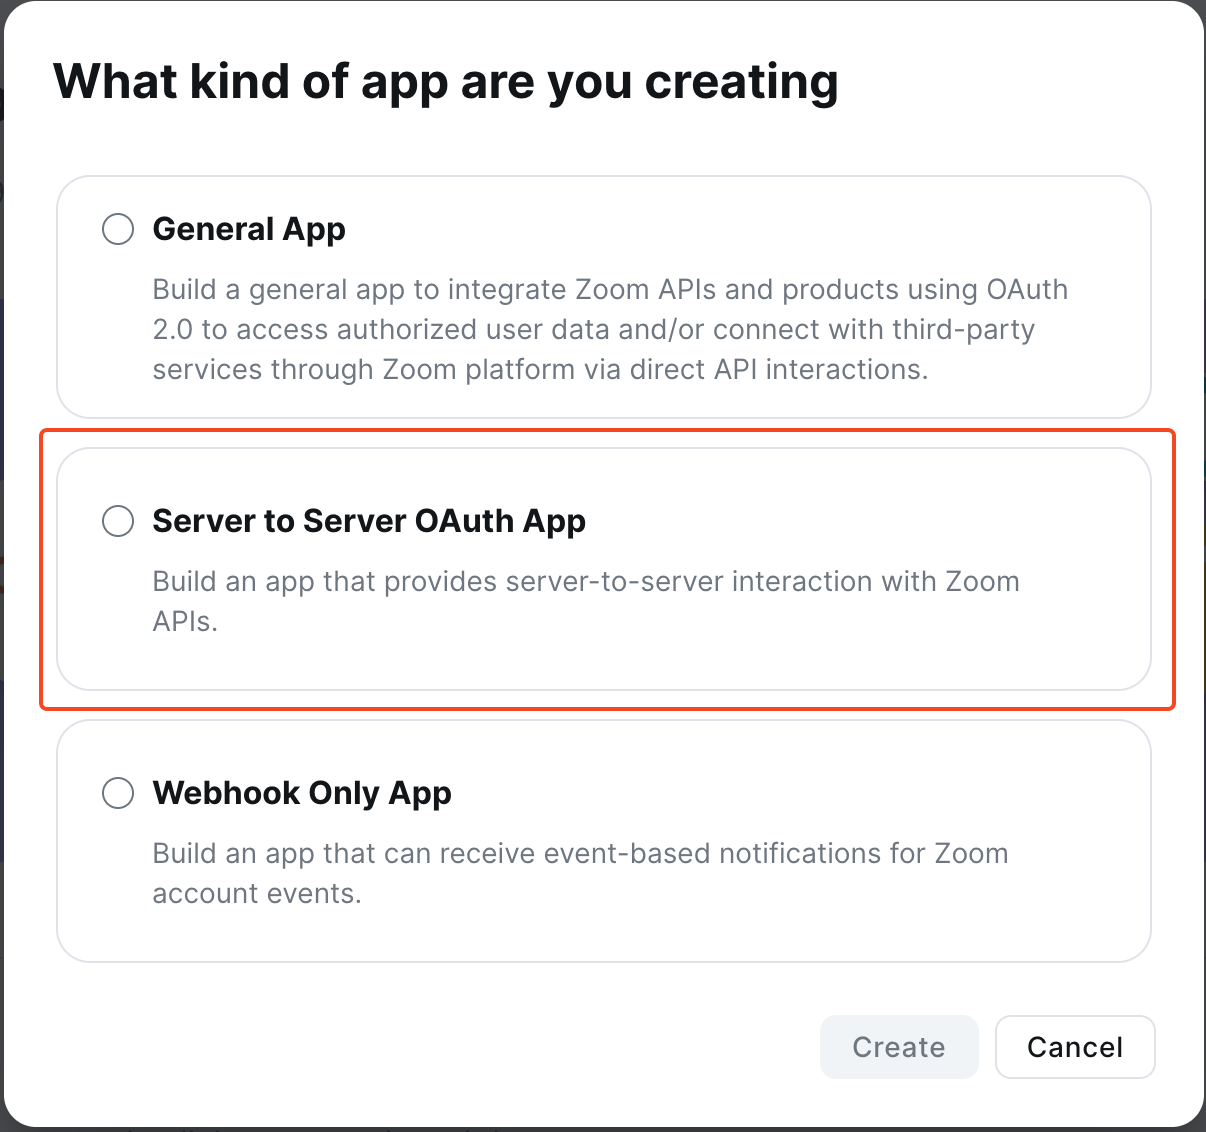
4. On the pop up screen, select Server to Server OAuth App
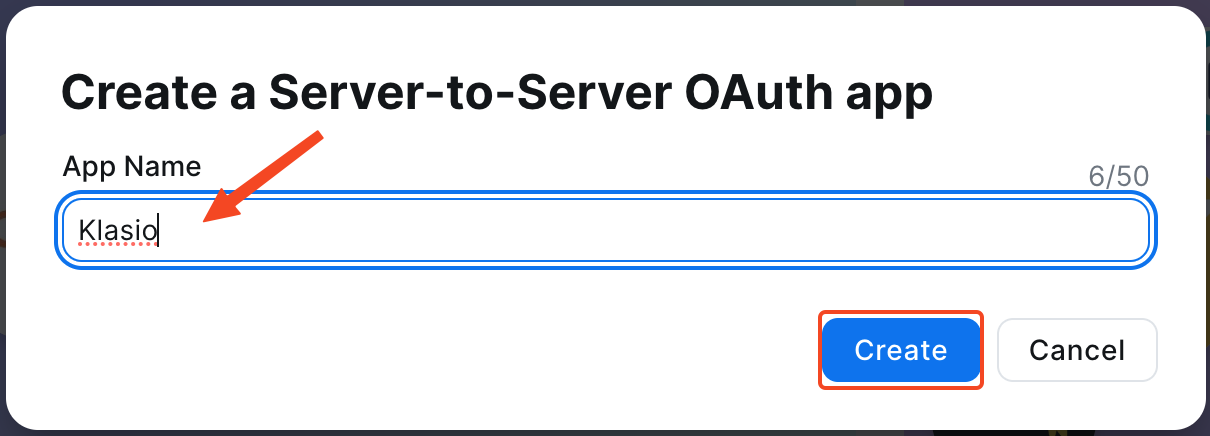
5. Next, enter App Name and click create.
6. On the next screen, you’ll be required to enter multiple info about your application.

7. Upload logo.

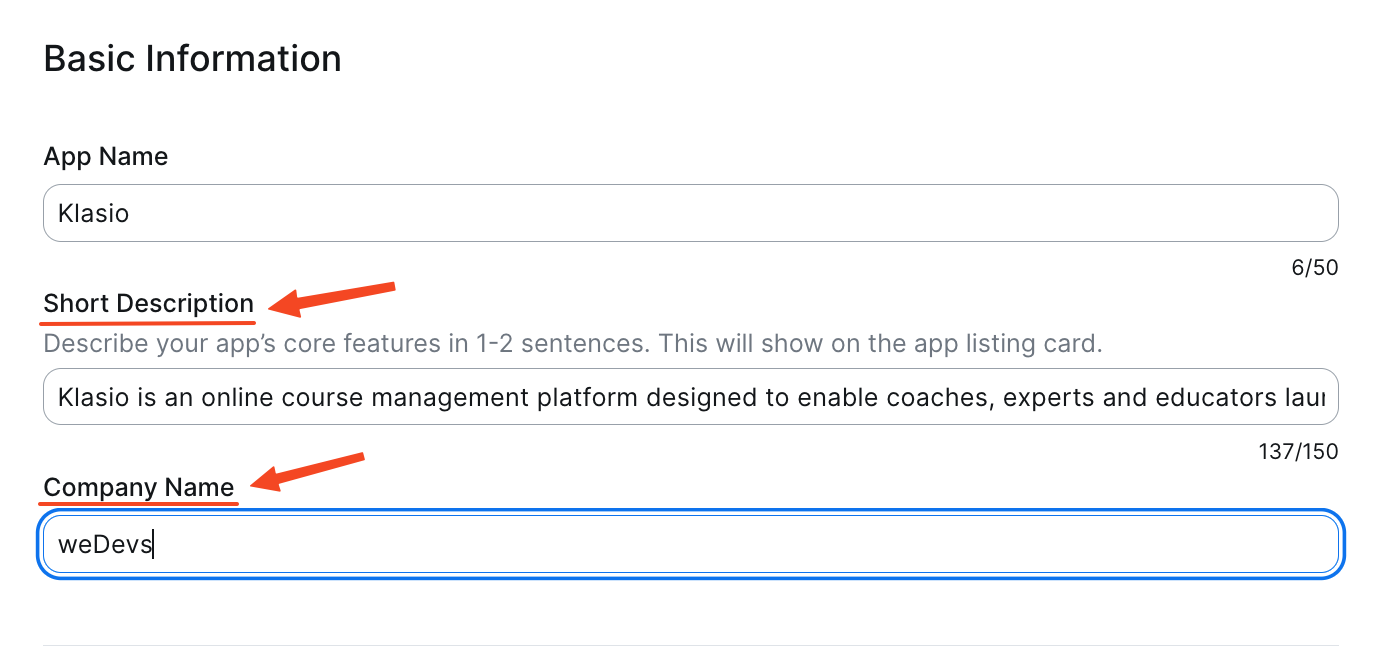
8. Under Information, insert a short description about the app, insert company name.
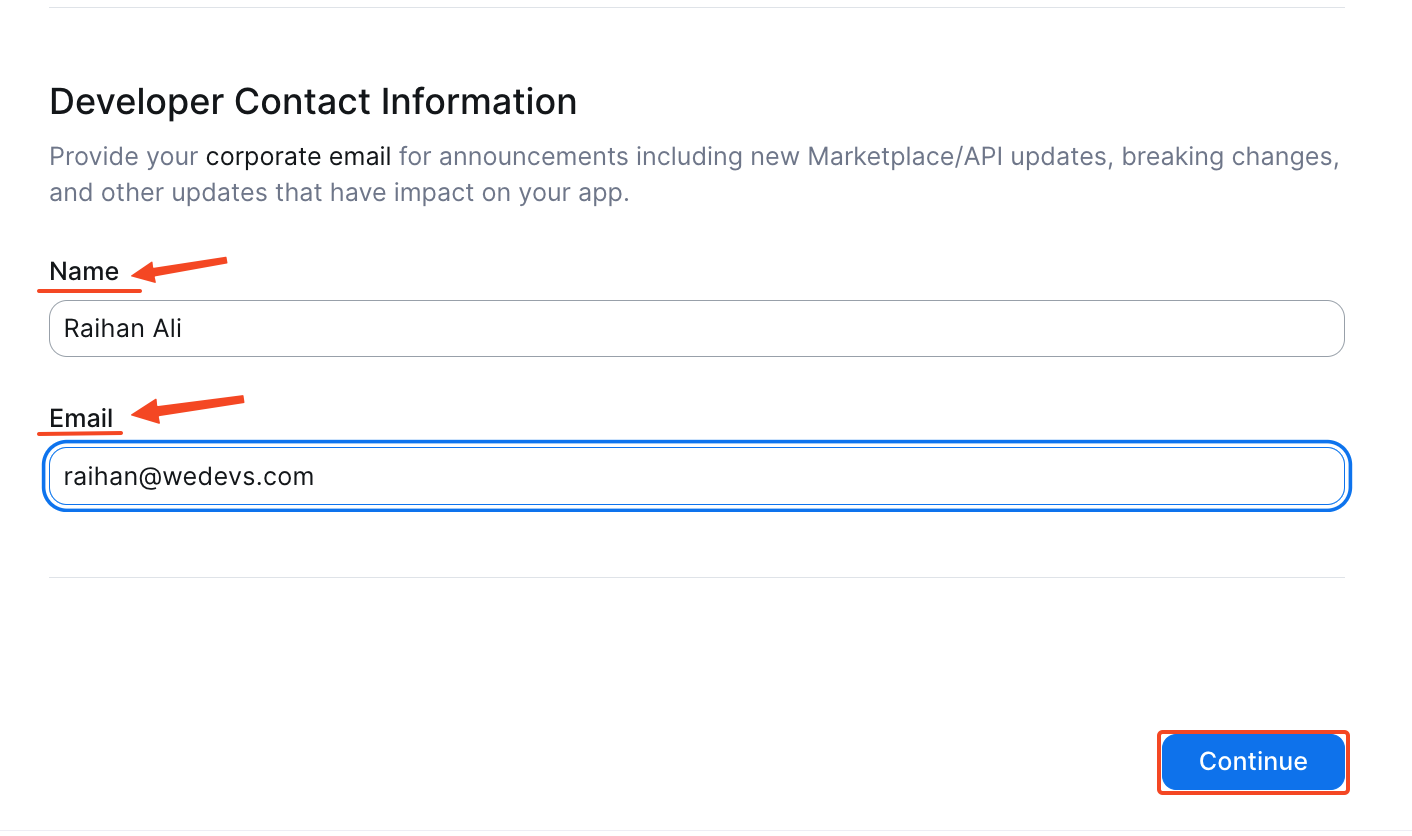
9. Insert developer contact information and hit Continue.
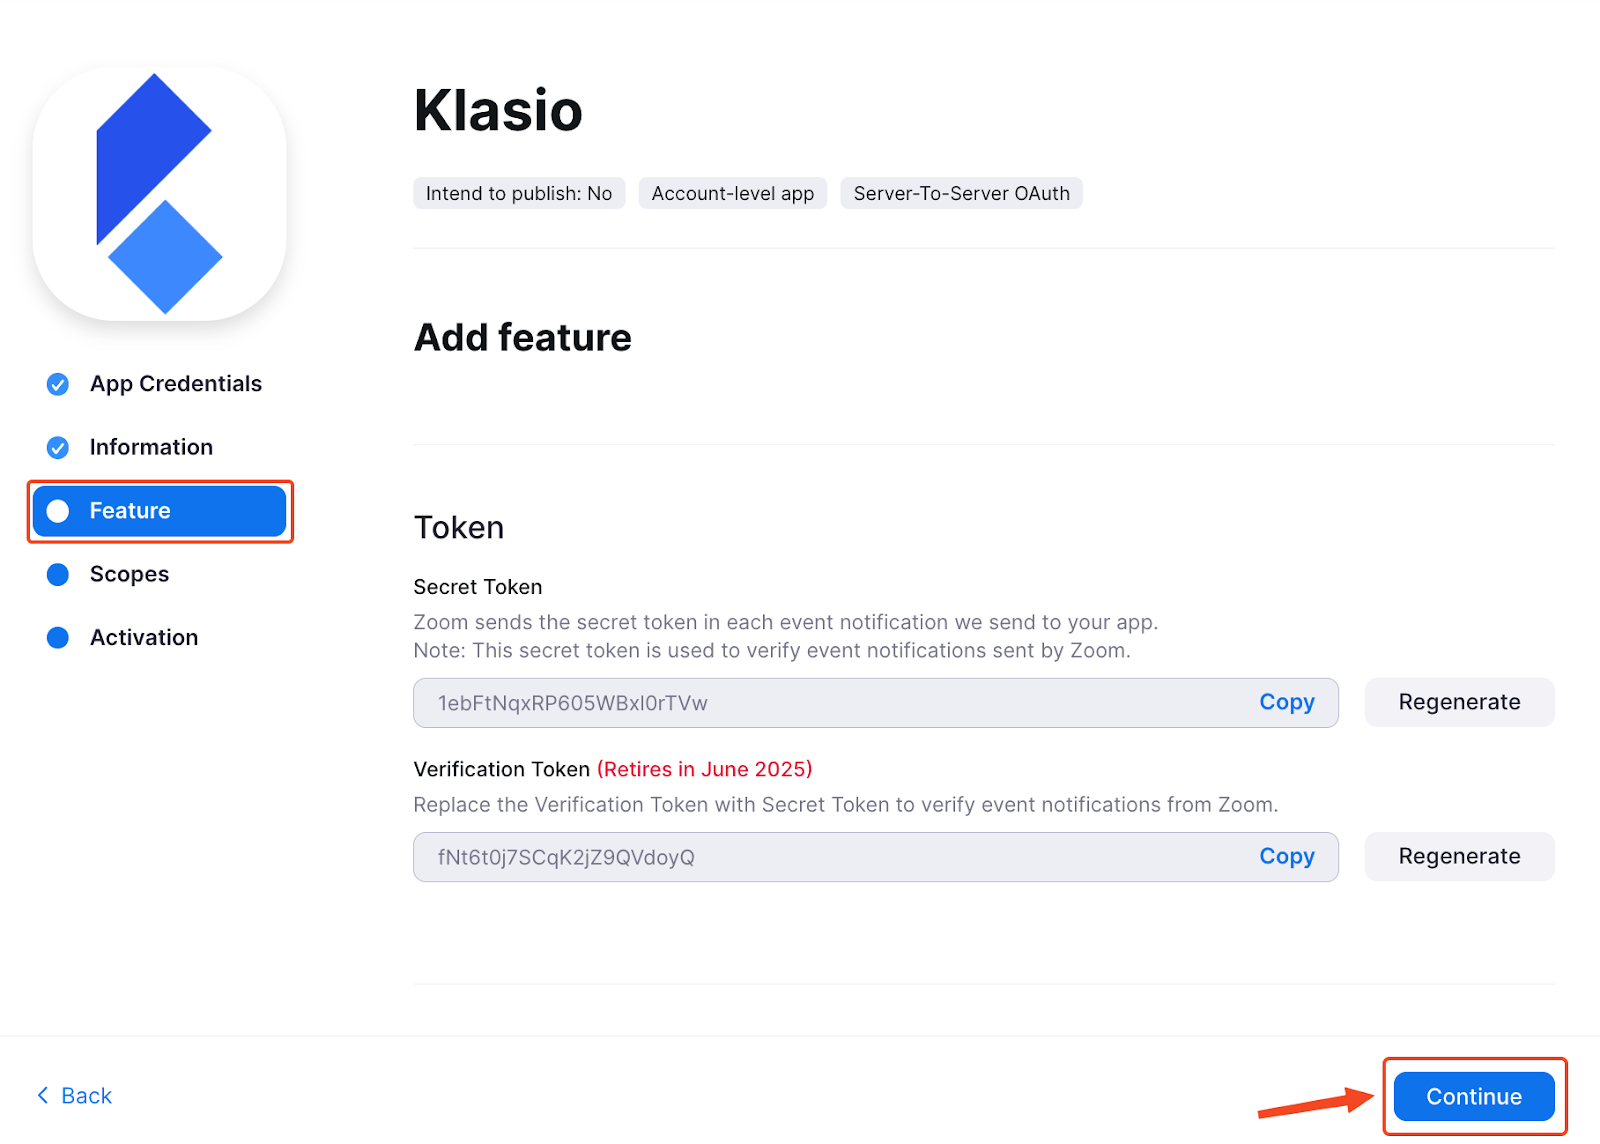
10. Under the Feature tab, no need to do anything, just click continue.
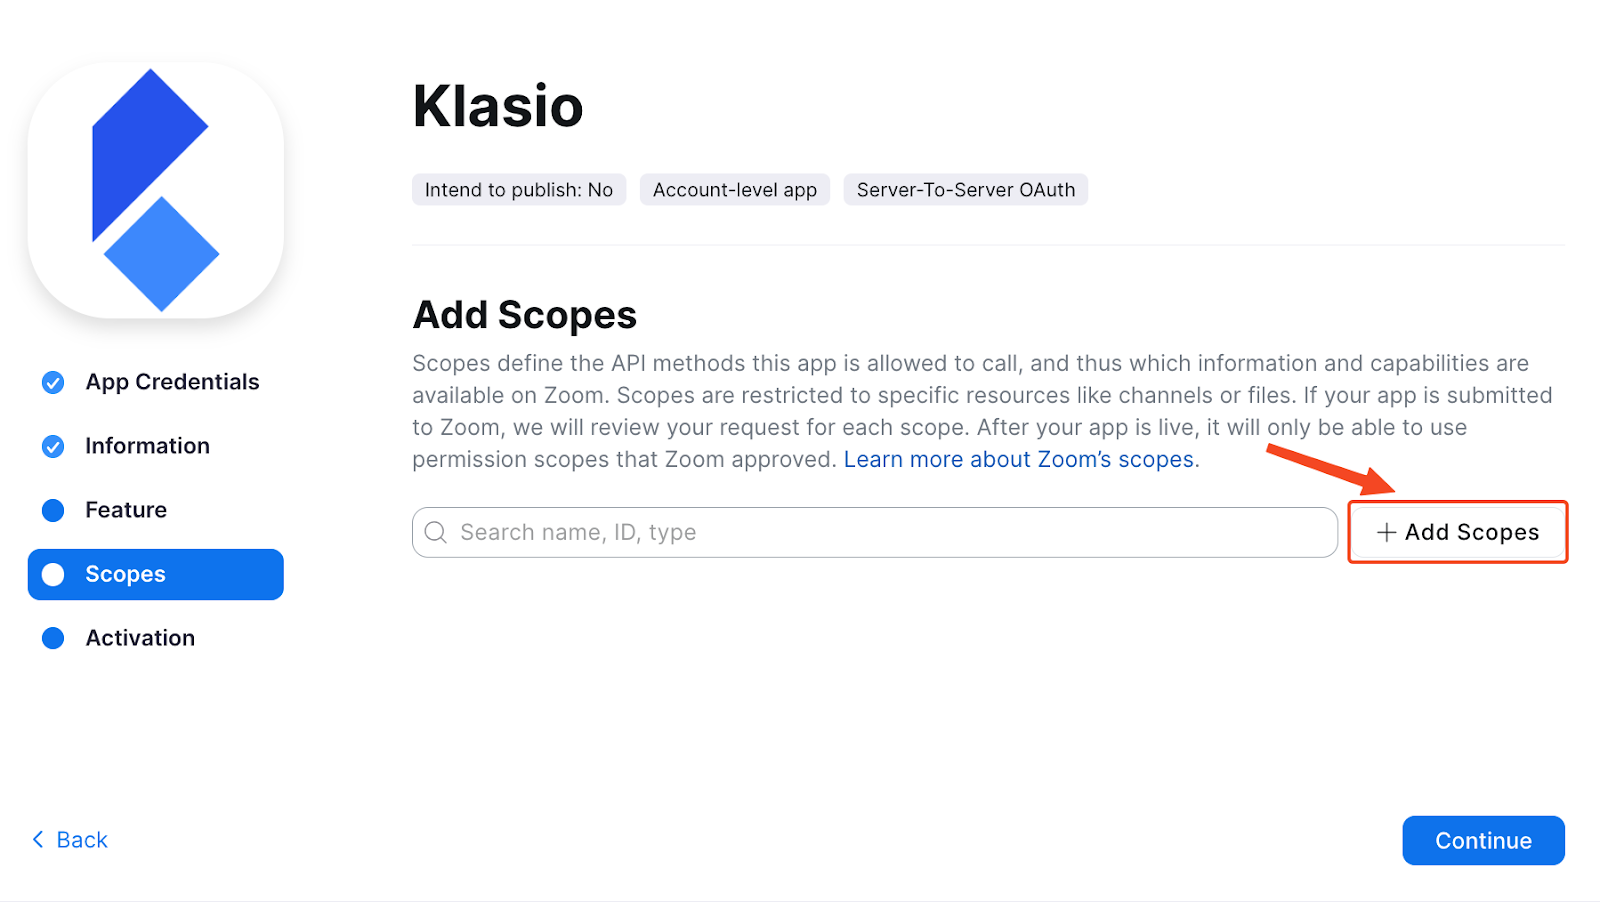
11. Then, under the Scopes tab, click Add Scopes.
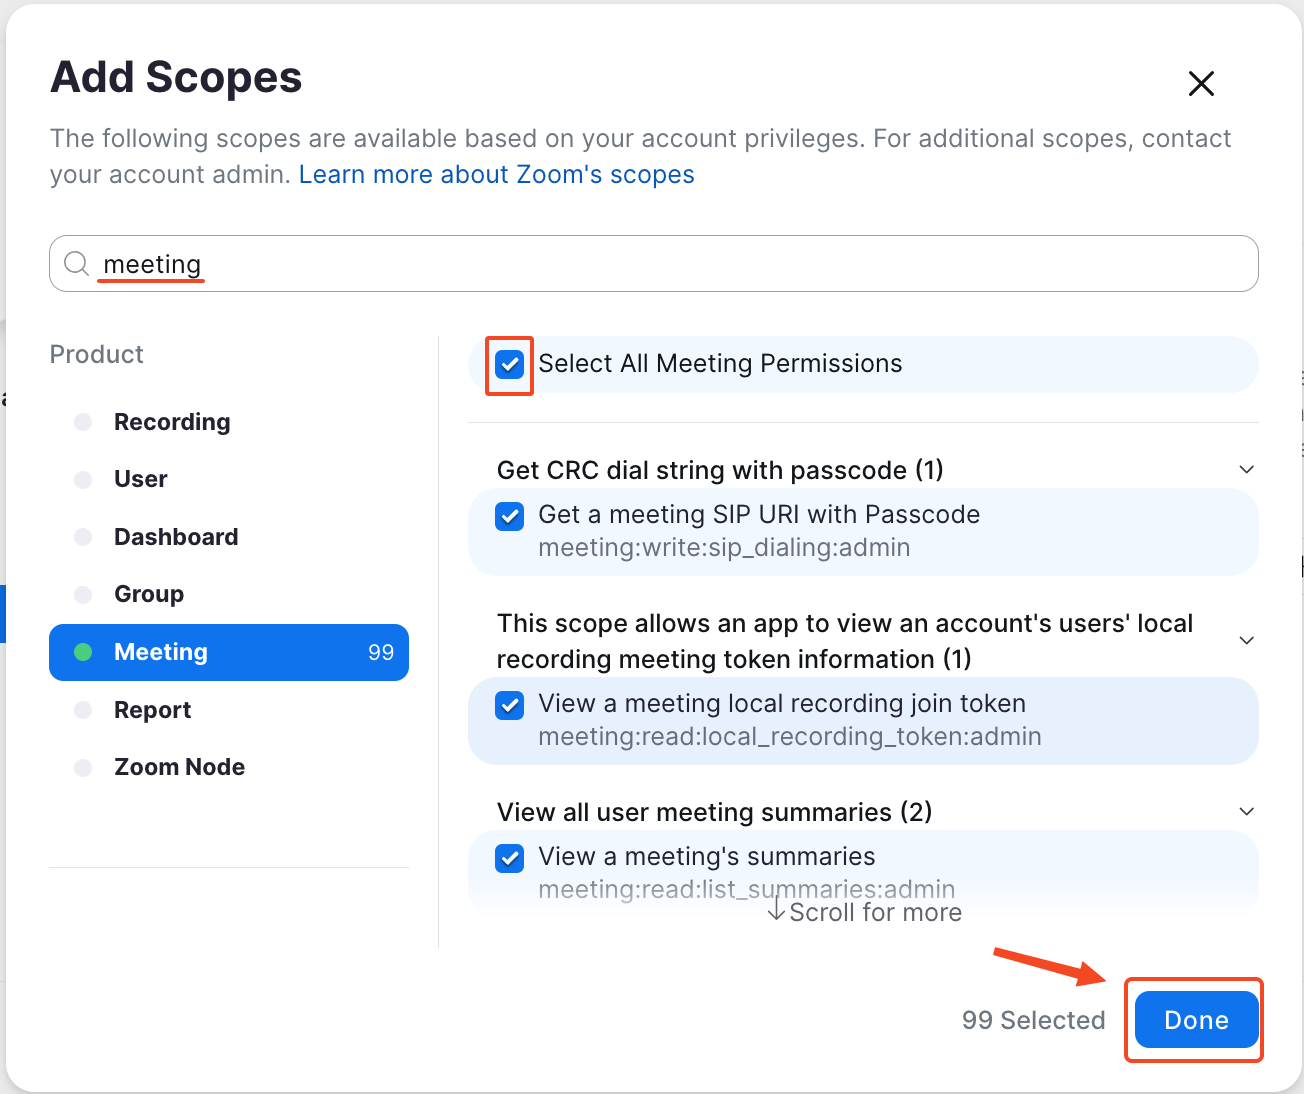
12. On the pop-up screen, search “Meeting” and then give tick on “Select All Meeting Permissions”. Next, click Done.
13. Next click Continue.
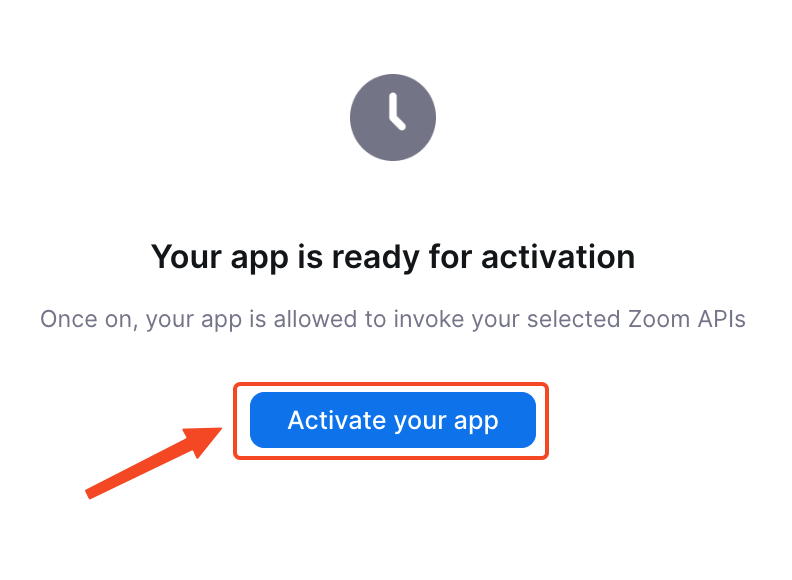
14. You’ll be asked to Activate your app. Click on it.
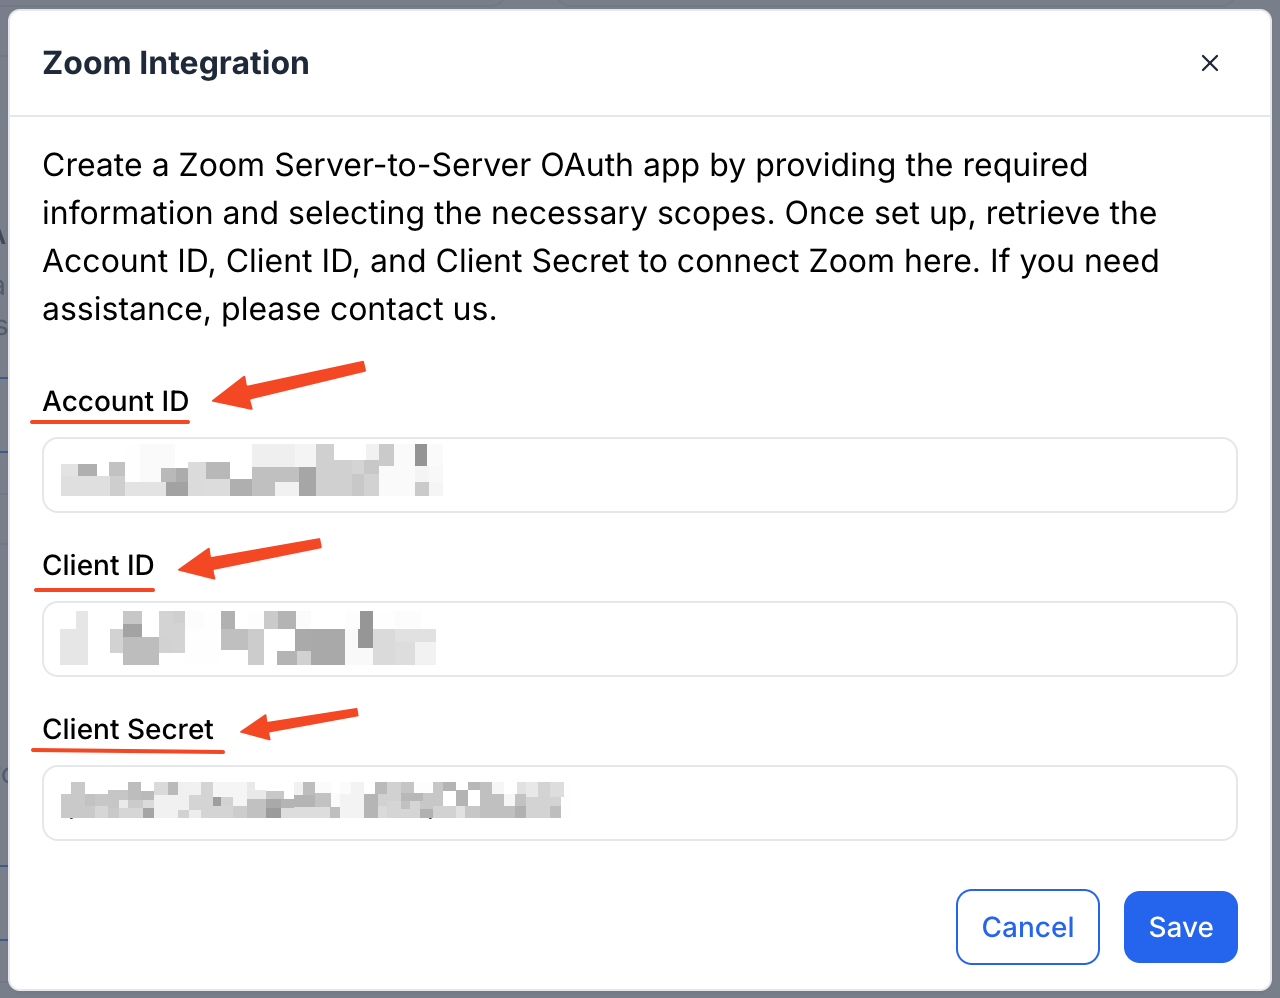
15. Now if you go back to the App Credentials tab, you’ll find your desired Account ID, Client ID and Client Secret.

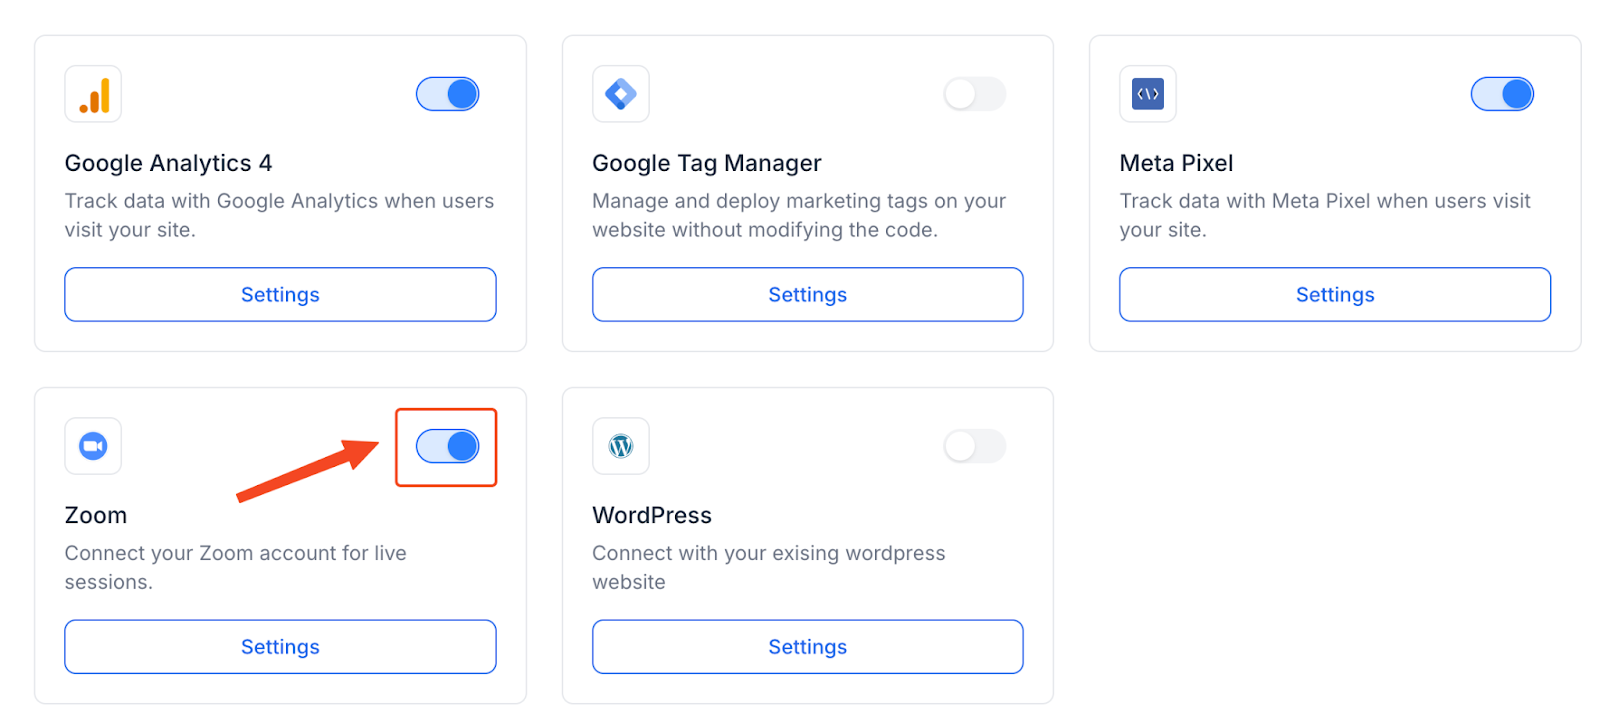
Copy and paste these into the Klasio app pop up and hit Save.
You’ll see that Zoom has been configured, and this toggle is on.
Offering Live Sessions as an Instructor in Klasio
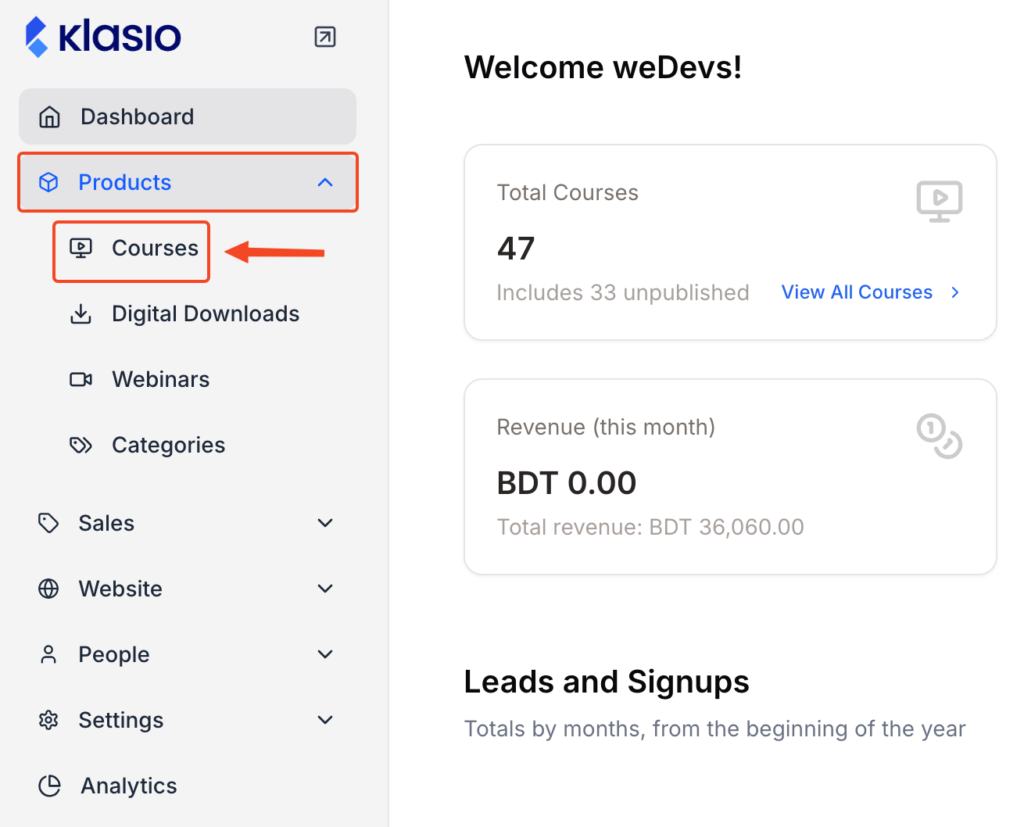
- First, log in to your Klasio instructor account.

- From the navigation menu, go to “Courses.”
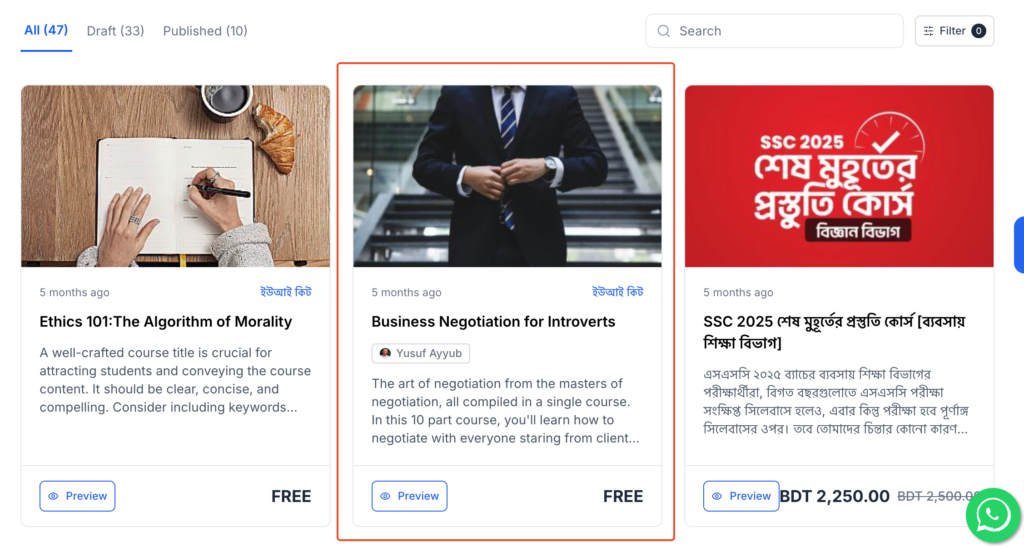
- Choose the course you want to add a live lesson.
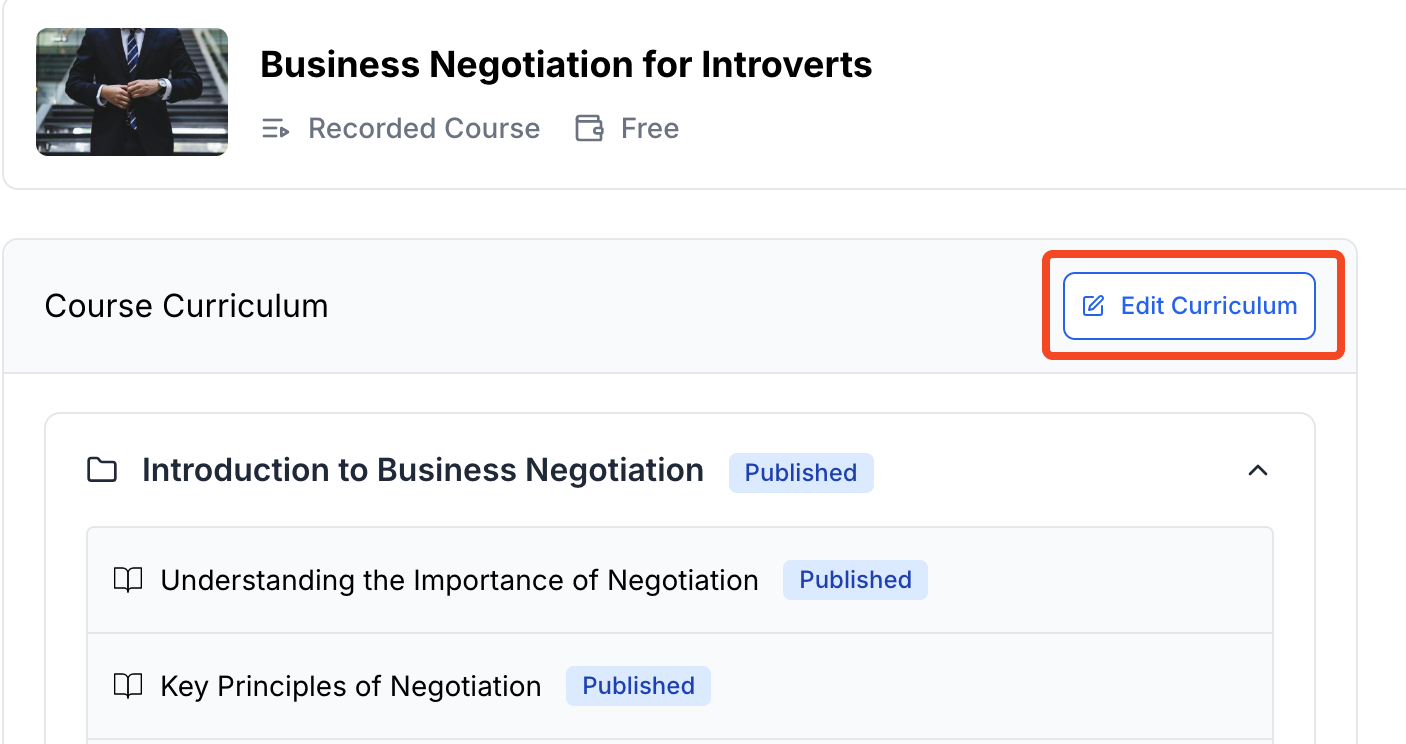
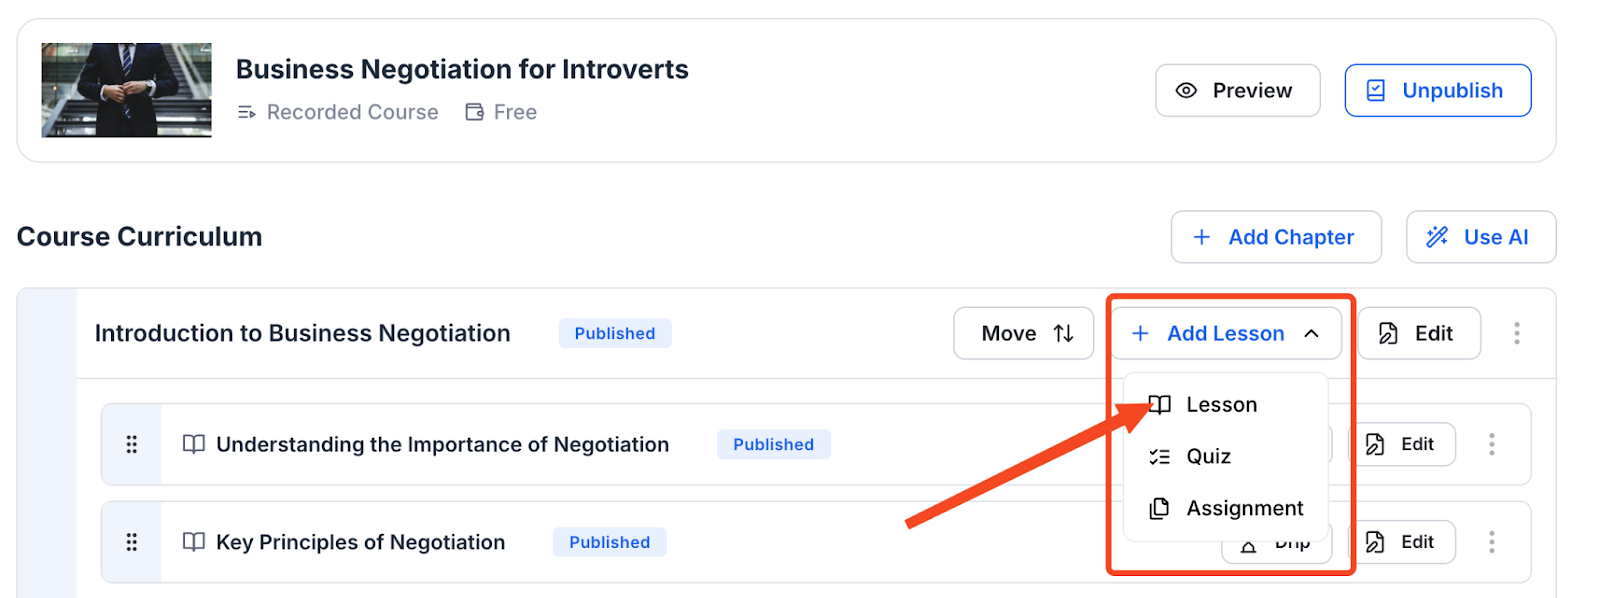
- Click on “Edit Curriculum.”
- Click on “Add Lesson” and from the dropdown, select “Lesson”
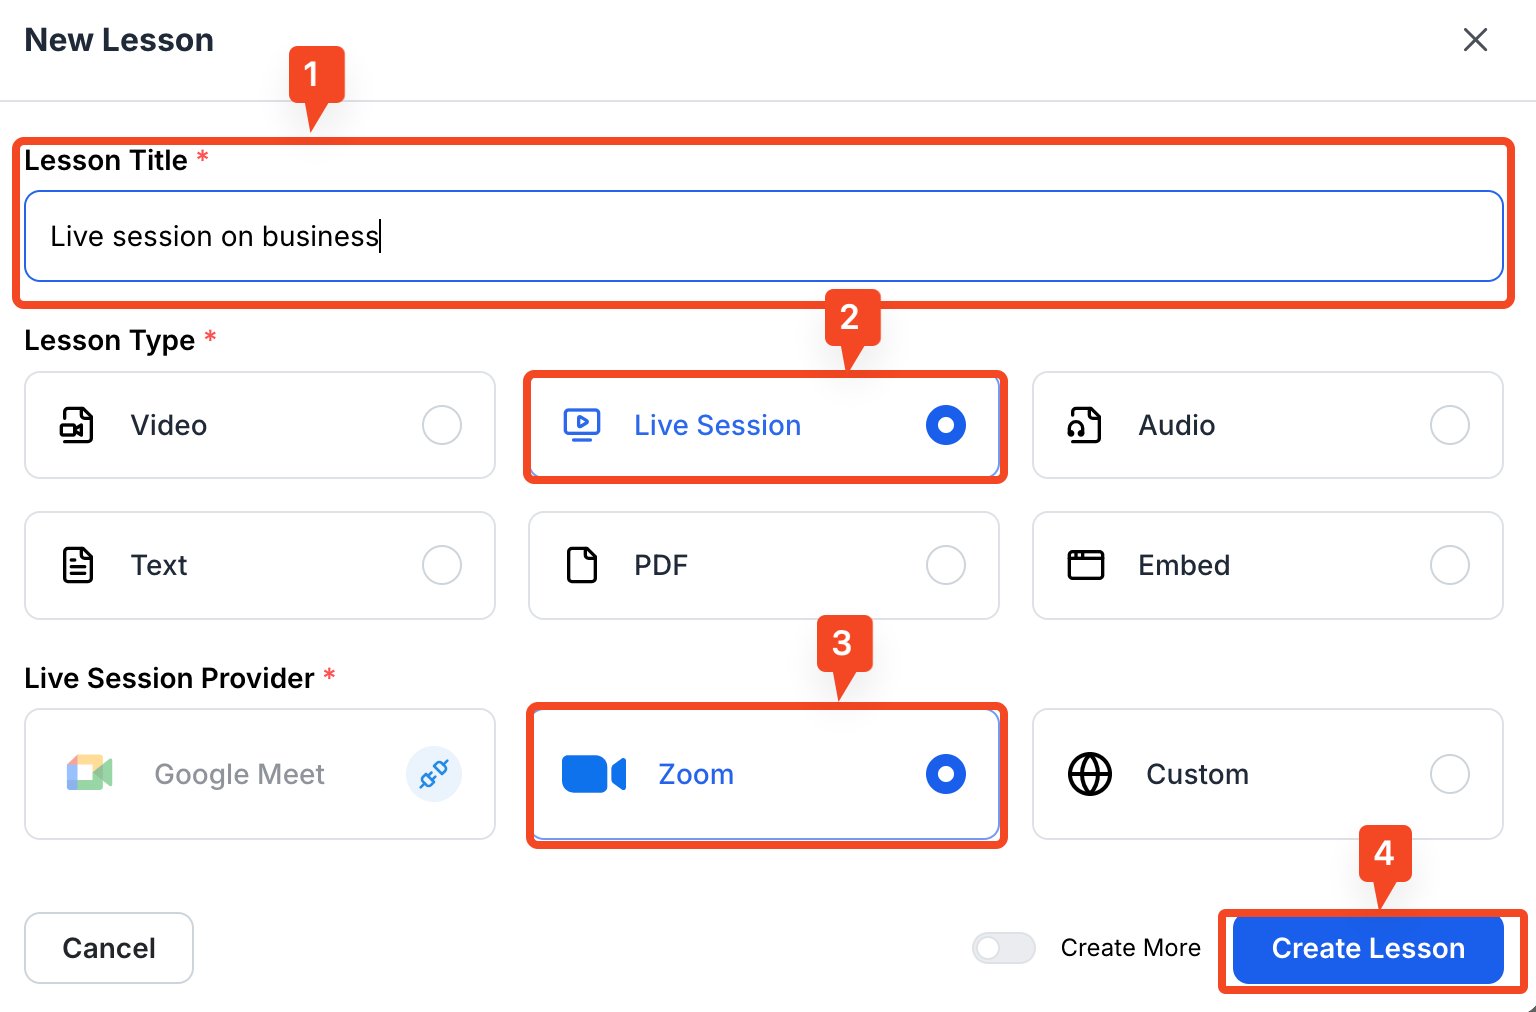
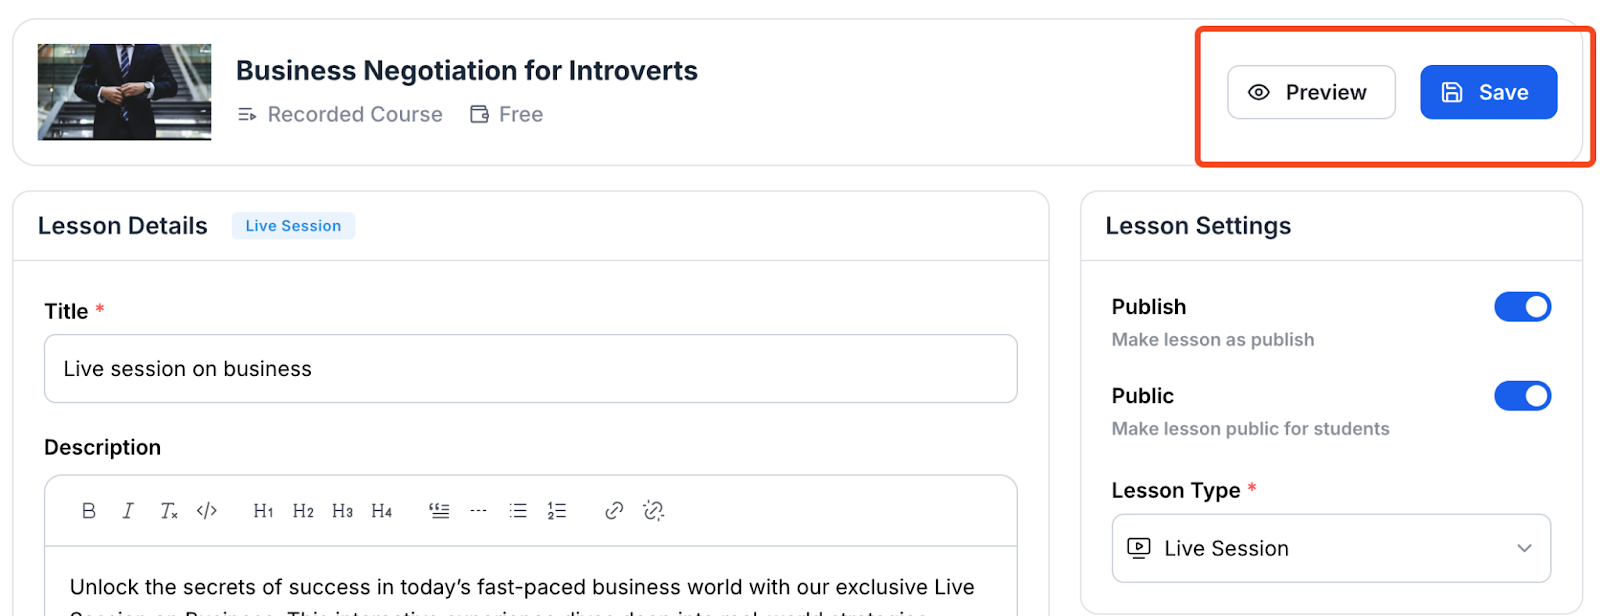
- First, give your live session a title, then select “Live Session” and choose “Zoom.” Finally, click on “Create Lesson.”
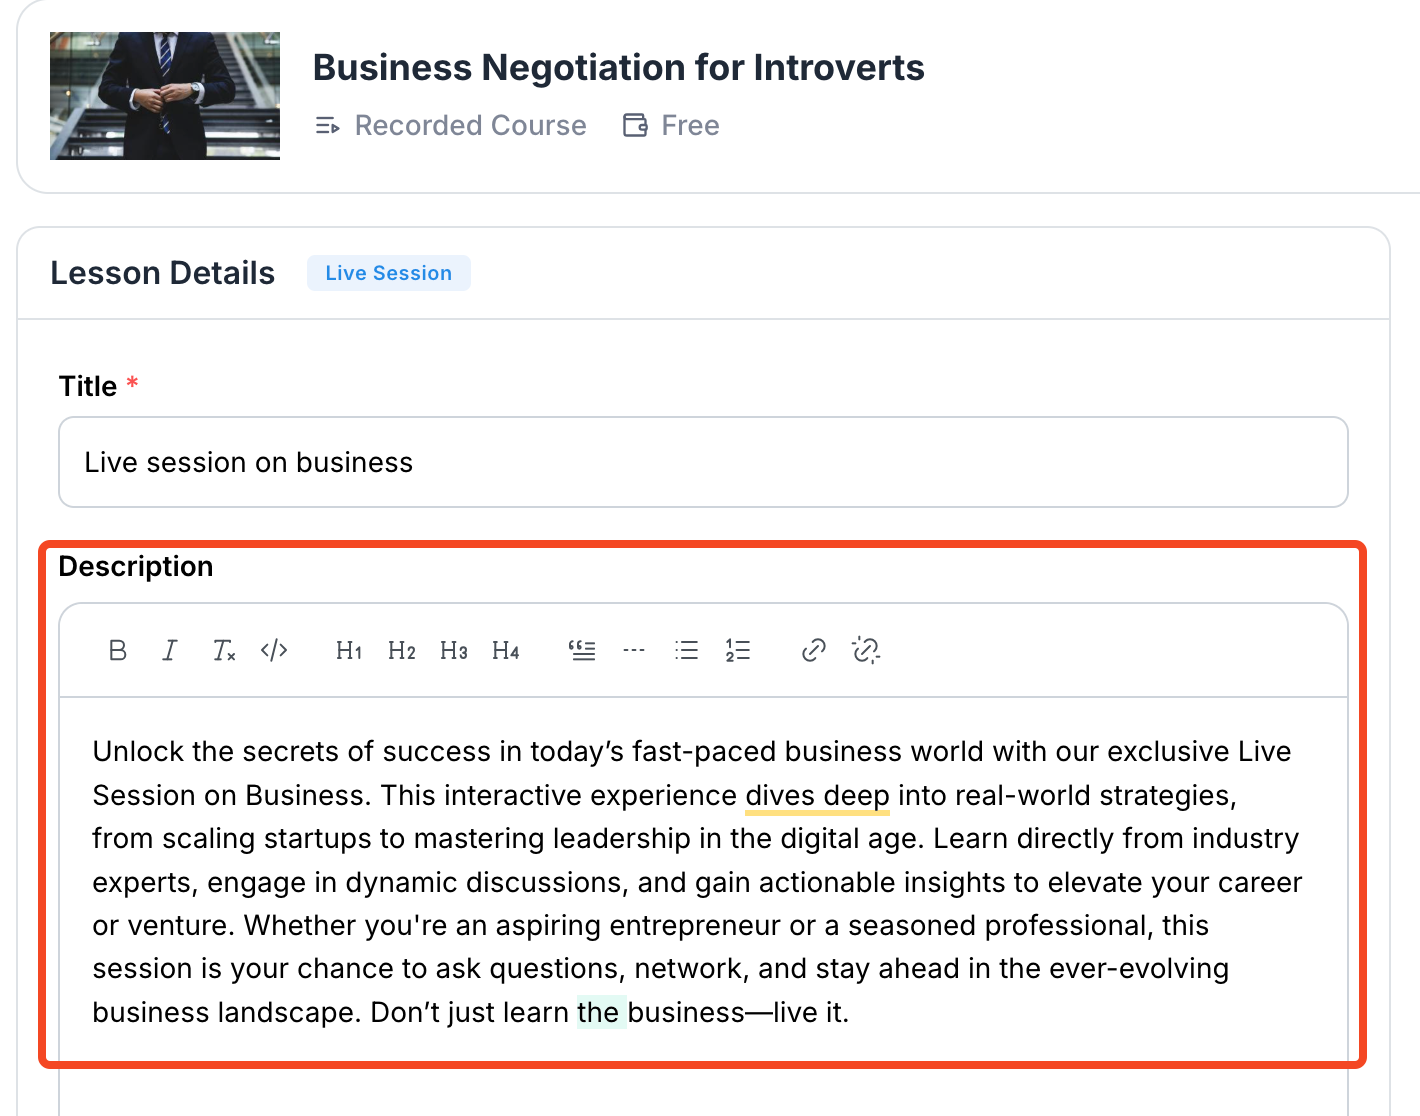
- You will be taken to the lesson editor where you can add a description to explain your live session.
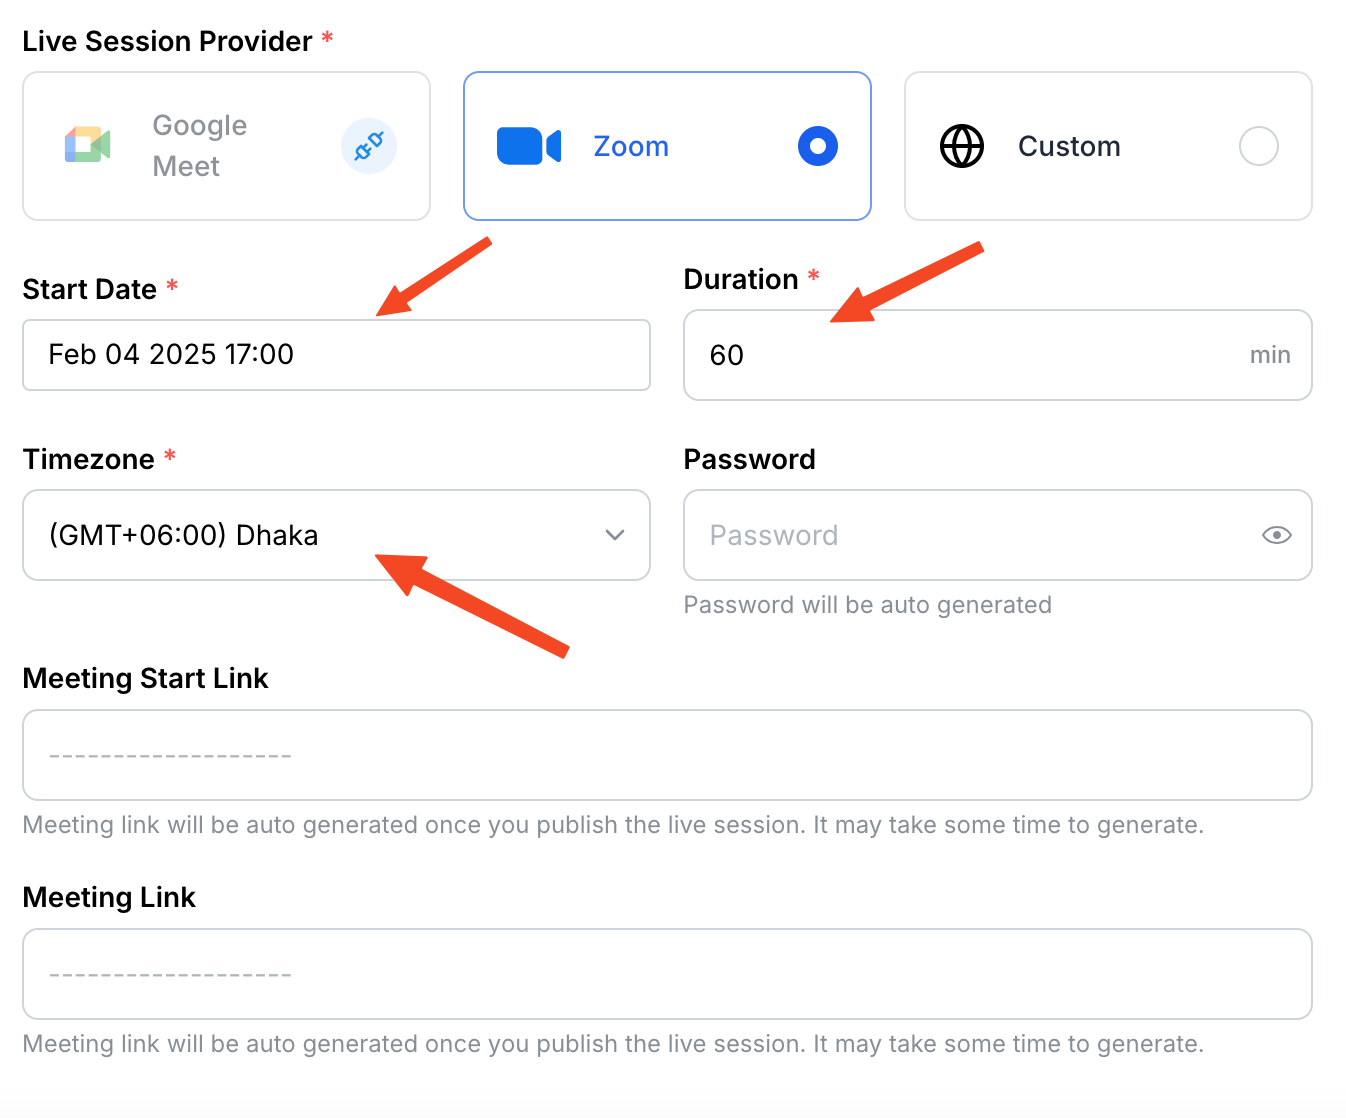
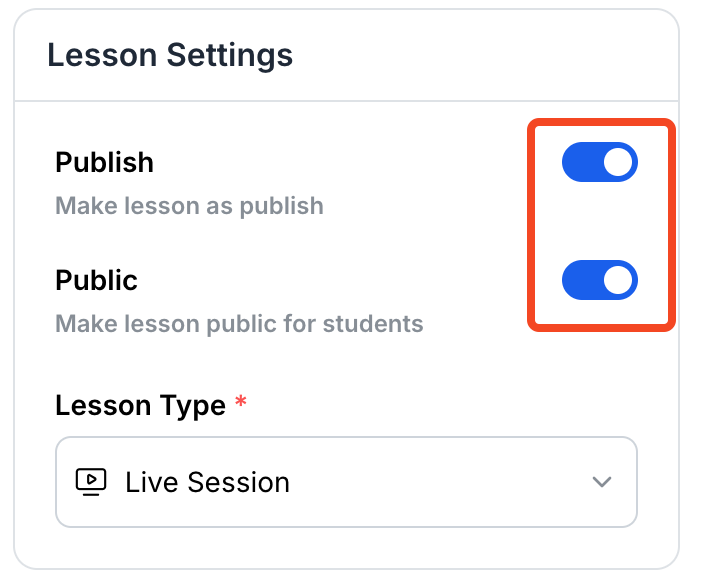
- You can also set essential details such as date, time, duration, and time zone.
- Once you are done, publish the live course and make it public.
- Now, it’s time to save the changes, or you could also see a preview of what the session would look like to your students.
- After publishing and saving the course, you will find the meeting link here.
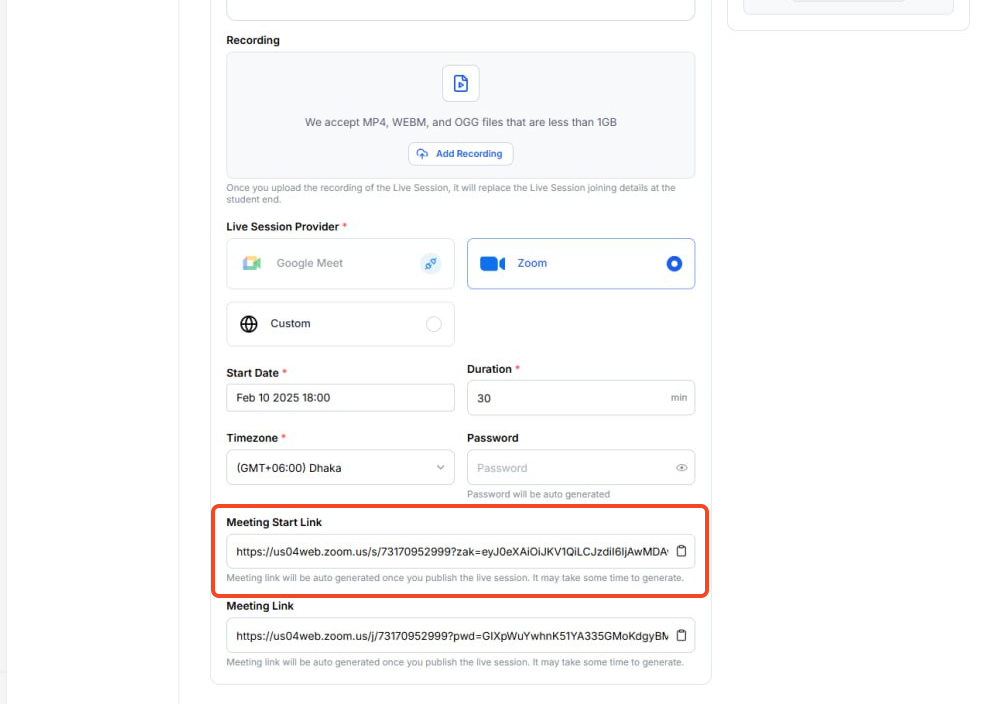
- Now, copy the Zoom session link and paste it into the browser when it’s time for the session.
Accessing Live Sessions as a Student in Klasio
- First, log in to your student account from the course website.
- Choose the course you are enrolled in for live session.
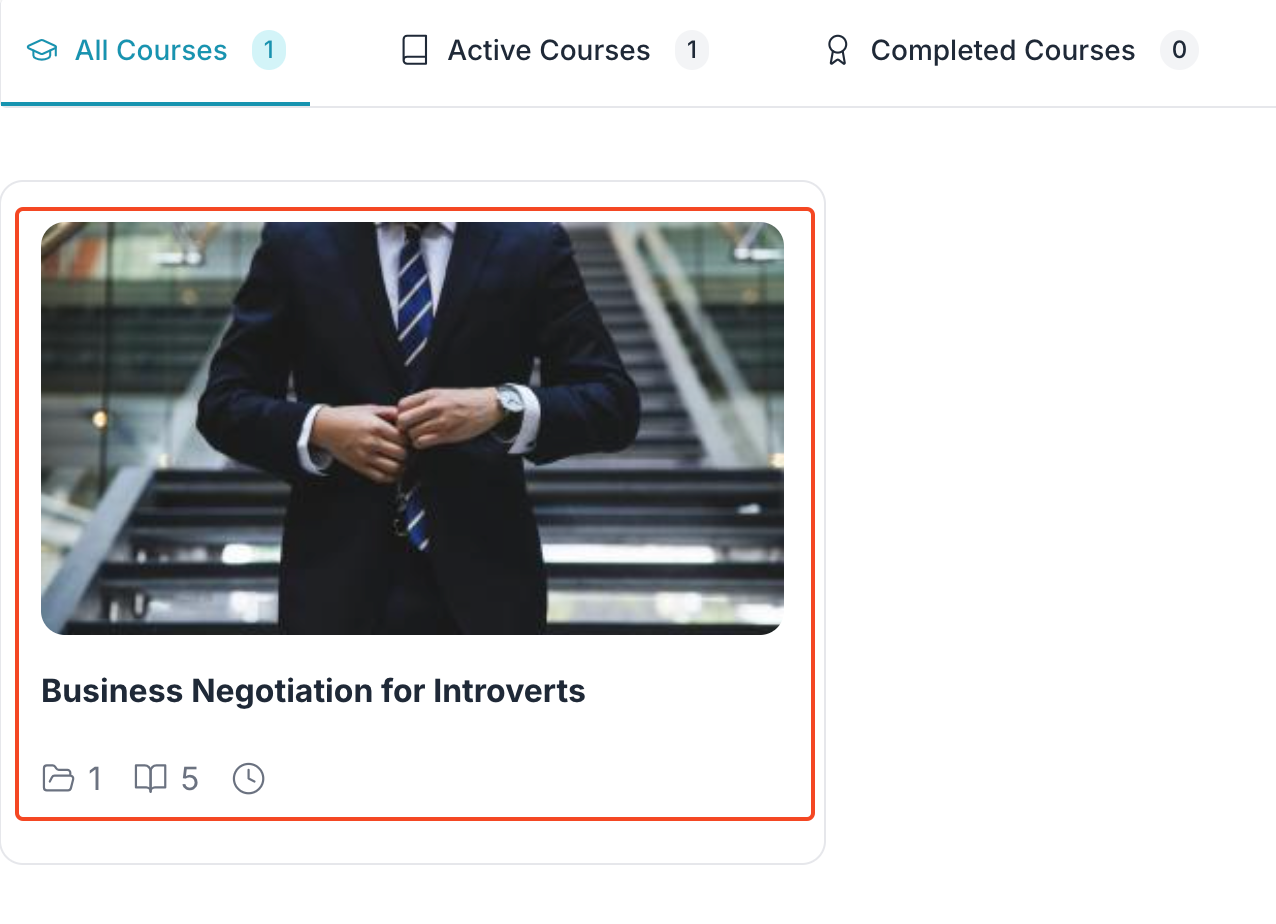
- Then, choose the lesson that contains the live lecture.
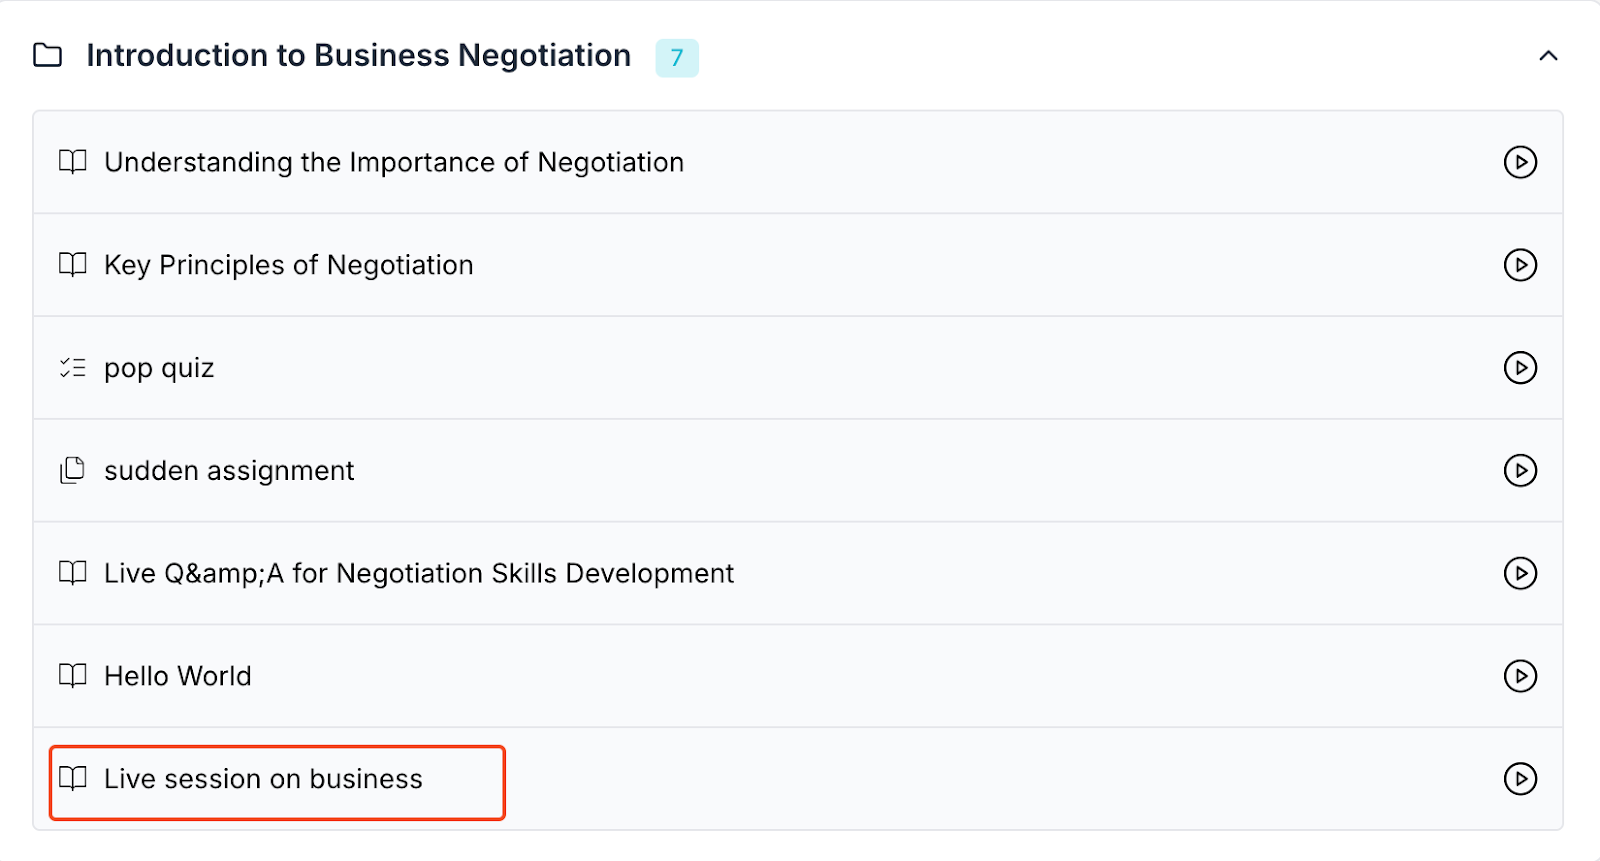
- When you click on the live lesson, you will be directed to a new window where you will get the link to join.
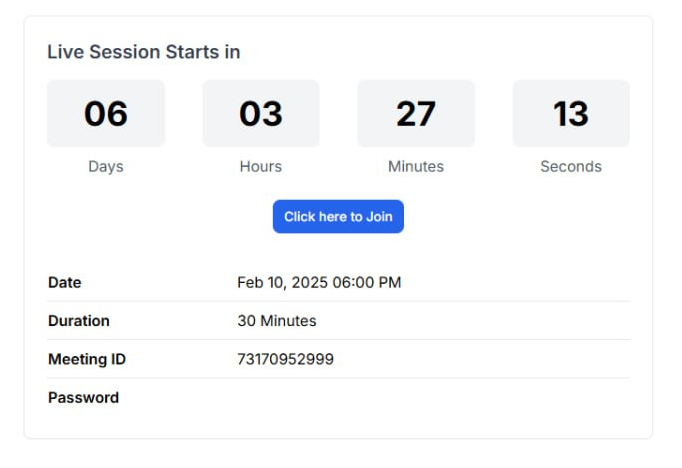
- Once you click on “Click Here to Join,” you will be taken to join the live session. Enter your name and click “Join” to join the meeting.

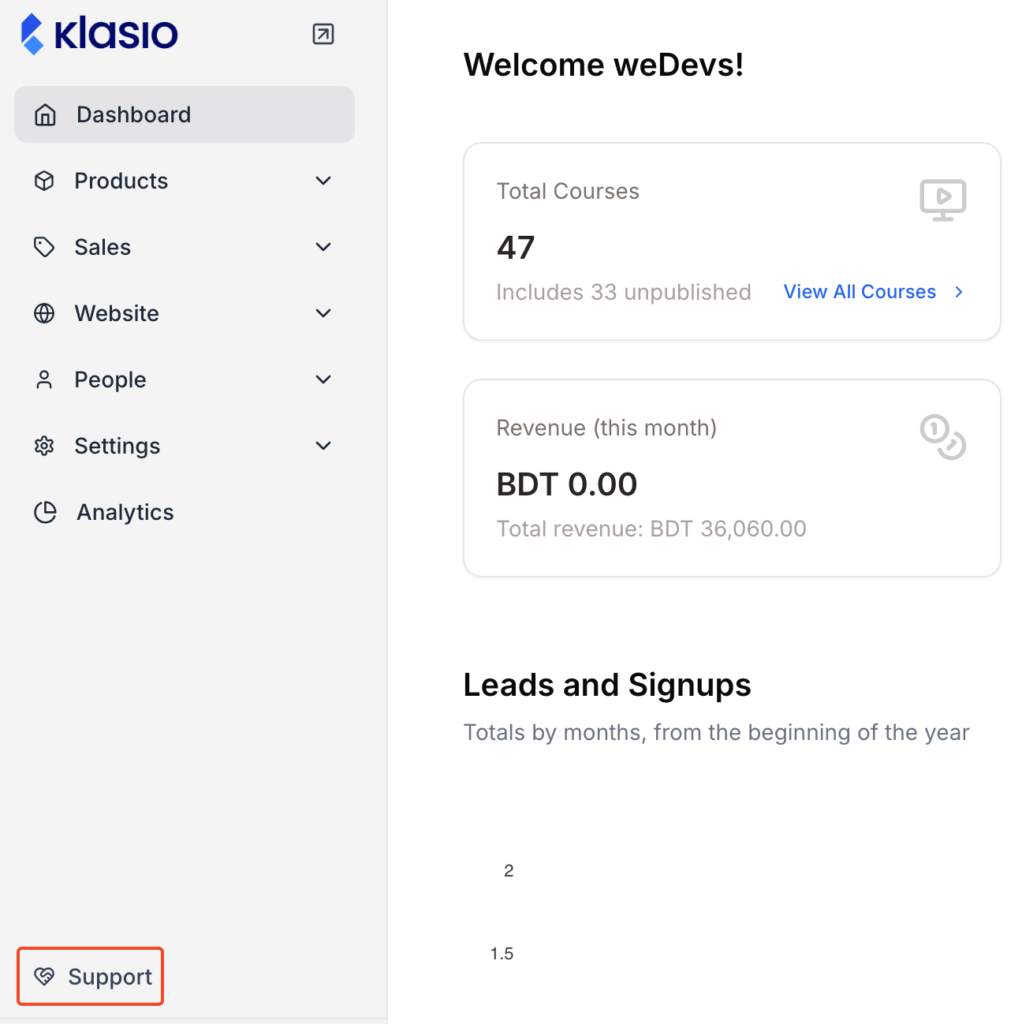
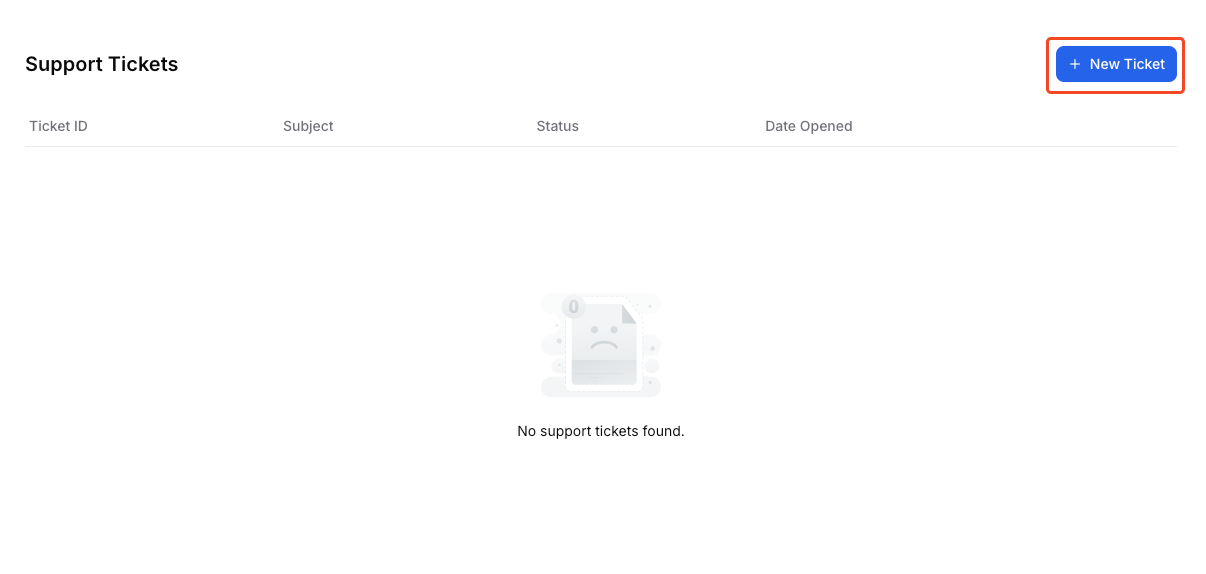
How to Avail Support as an Admin if You Face Any Issues
- From the admin dashboard, click on the “Support” menu on the navigation bar.
2. To share your concern with us, click on “New Ticket” button.
3. On the next screen, select the type of issue you want to raise.
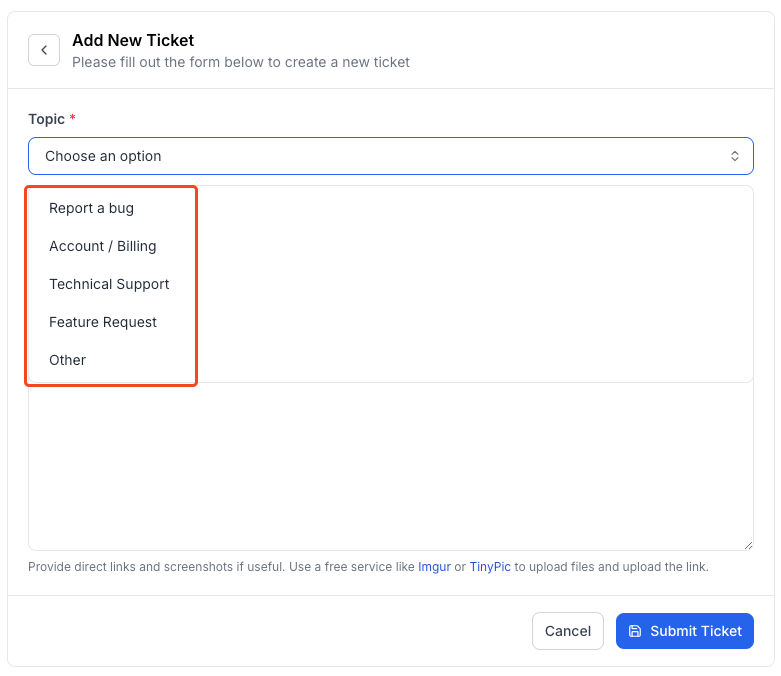
4. Next, insert your subject line and describe your issue with maximum information.
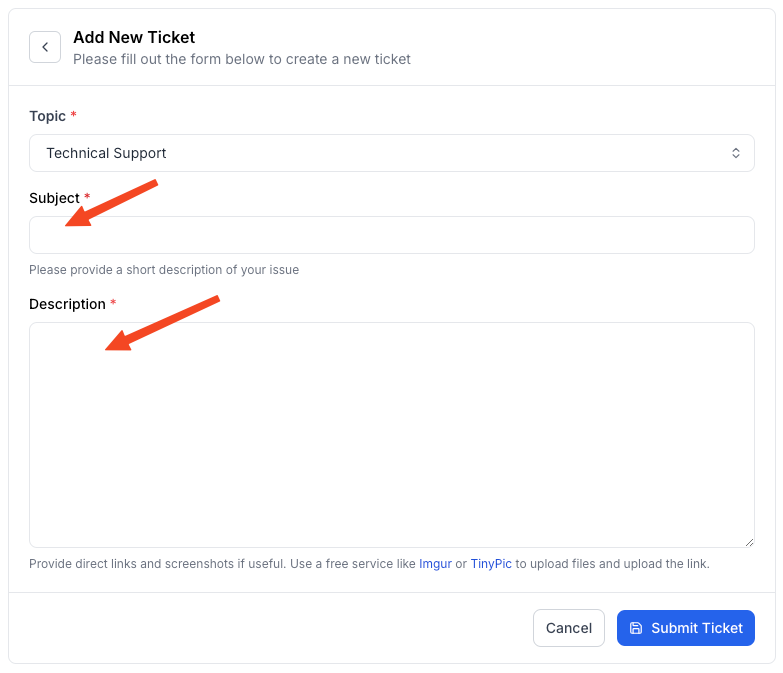
5. If you need to add any screenshots for clarification, include the Imgur/TinyPic link within the description box.

6. Click Submit Ticket once you’re ready to submit.
Our support staff will respond to it at our earliest convenience.
Testing and Verifying
By now, you’ve successfully integrated Zoom with Klasio. But before you start scheduling live classes, it’s important to make sure everything is functioning properly.
First, create a test meeting from any sample course. Choose a date and time that works for you and name it something like “Klasio Test Meeting.”
Next, head over to the student dashboard. Look for live session you just set up. Click on it to join and see if it opens up your Zoom app. If it does, great job! Your integration is working smoothly.
Now, take a moment to check these additional features:
- Can you edit the meeting details in Klasio?
- Do you see links for both the instructor and student?
- Is the meeting countdown available in the student portal?
Make sure to explore all the features you plan to use for your classes. It’s better to spot any issues now rather than when real students are waiting for their lessons. This testing phase is crucial for ensuring your users enjoy this feature.
A Walk Through of Zoom Backend Panel
Now that you’ve connected Zoom to Klasio, you’re all set up to conduct live classes with Zoom. Interestingly, you can explore further. The Zoom backend panel is like your command center for managing all your virtual classes, and it comes packed with handy features.
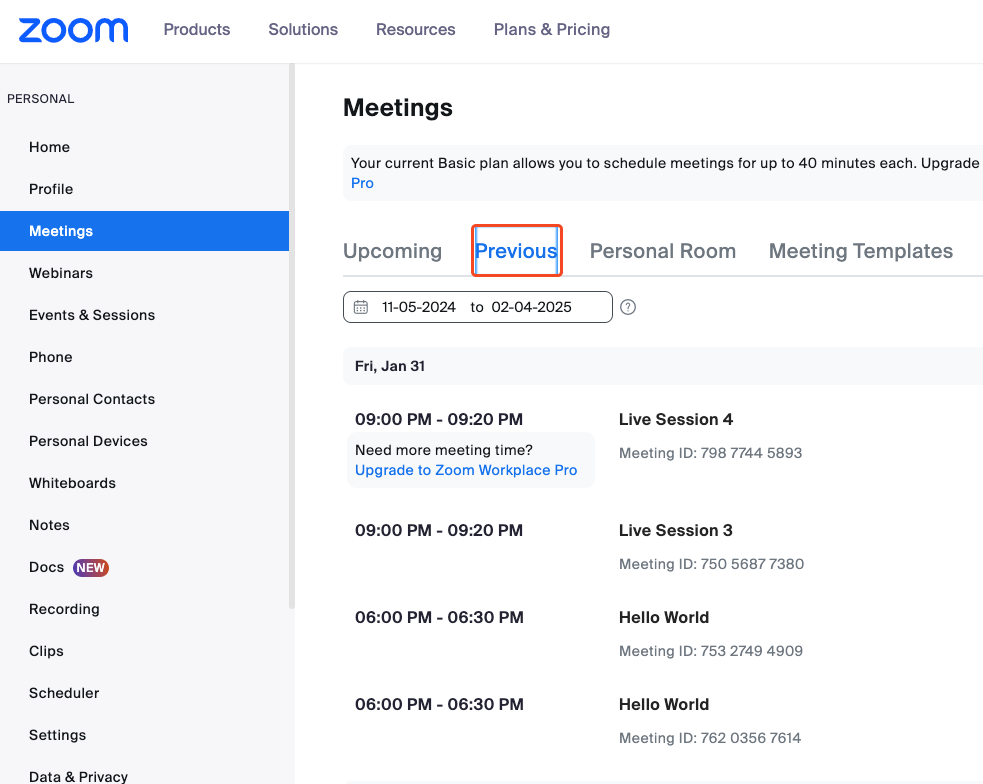
With just a few clicks in the Zoom Panel, you can view, edit, and delete both upcoming and past meetings.
- Upcoming Meetings Tab
Once your Zoom integration is up and running, you’ll see a new tab labeled “Upcoming Meetings.” This is where you can find a complete list of all your scheduled Zoom meetings. You can easily search for specific meetings and filter them by course, date, or status. Plus, you can edit or delete meetings right from this tab.

2. Expired Meetings Tab
In the “Expired Meetings” tab, you’ll find all the meetings that have already happened. Just like in the previous tab, you can search, filter, edit, and delete these past meetings. If you need to reschedule one of these expired meetings, just hit the edit button and change the date and time. It will automatically move back to the “All Meetings” tab for you.
This feature helps keep everything organized while giving you the flexibility to reschedule if necessary.
3. Settings Tab
The Settings tab allows you to customize how your meetings operate. Here are some key options you can adjust:
- Join Before Host: Let students enter the meeting before you arrive.
- Host Video: Automatically start your video when you join.
- Participants Video: Enable participants’ video as soon as they join.
- Mute Participants: Mute everyone’s audio when they enter the meeting.
- Enforce Login: Make sure only logged-in users can join.
For recording settings, you have a few choices too:
- No Recordings: Disable recording entirely.
- Local Drive: Save recordings directly on your computer.
- Zoom Cloud: Store recordings in Zoom’s cloud storage.
These settings let you tailor the meeting experience to fit your teaching style and preferences. With everything set up in the Zoom backend panel, you’re ready to manage your virtual classes like a pro!
Wrapping Up
Over the years, Zoom has evolved as one of the best virtual classroom software. Choosing an LMS with Zoom integration is a crucial step in improving the user experience and reducing administrative workload.
This powerful combination empowers educators to deliver engaging content, encourages collaboration and interaction among learners, simplifies administrative tasks, and fosters a seamless and inclusive learning experience.
Note that, this is just the tip of the iceberg of what Klasio can do! Zoom LMS Integration is just one of the fantastic integrations in our integrations list.